
Deactivate auto-correction on iOS – Deactivating auto-correction on an iOS device is a straightforward process that can significantly enhance your typing experience, especially if you find the auto-correction feature more hindering than helpful. Here’s a simple tutorial on how to turn off auto-correction on an iOS device:
Step 1: Open Settings
- Start by tapping on the “Settings” app on your iOS device. This app is typically found on your home screen and is represented by a gear icon.
Step 2: Access Keyboard Settings
- Once in the Settings app, scroll down and tap on “General” to open the general settings for your device.
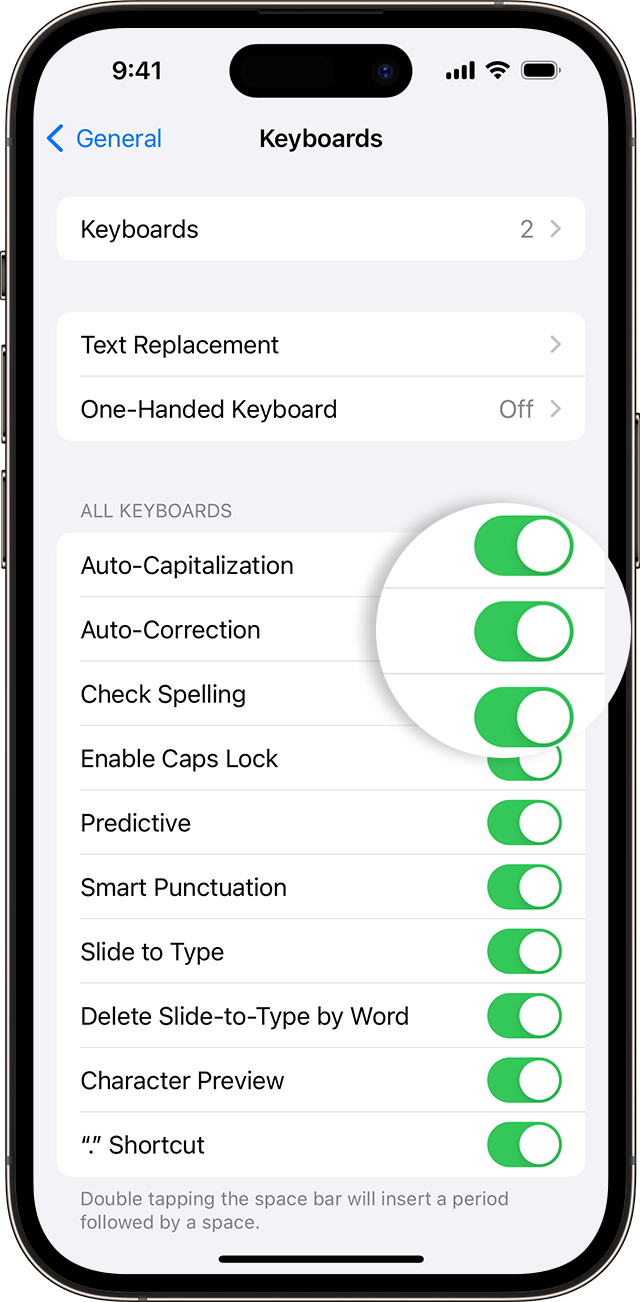
- In the General settings menu, look for “Keyboard” and tap on it. This will take you to the keyboard settings where you can customize various aspects of your keyboard’s behavior.
Step 3: Turn Off Auto-Correction
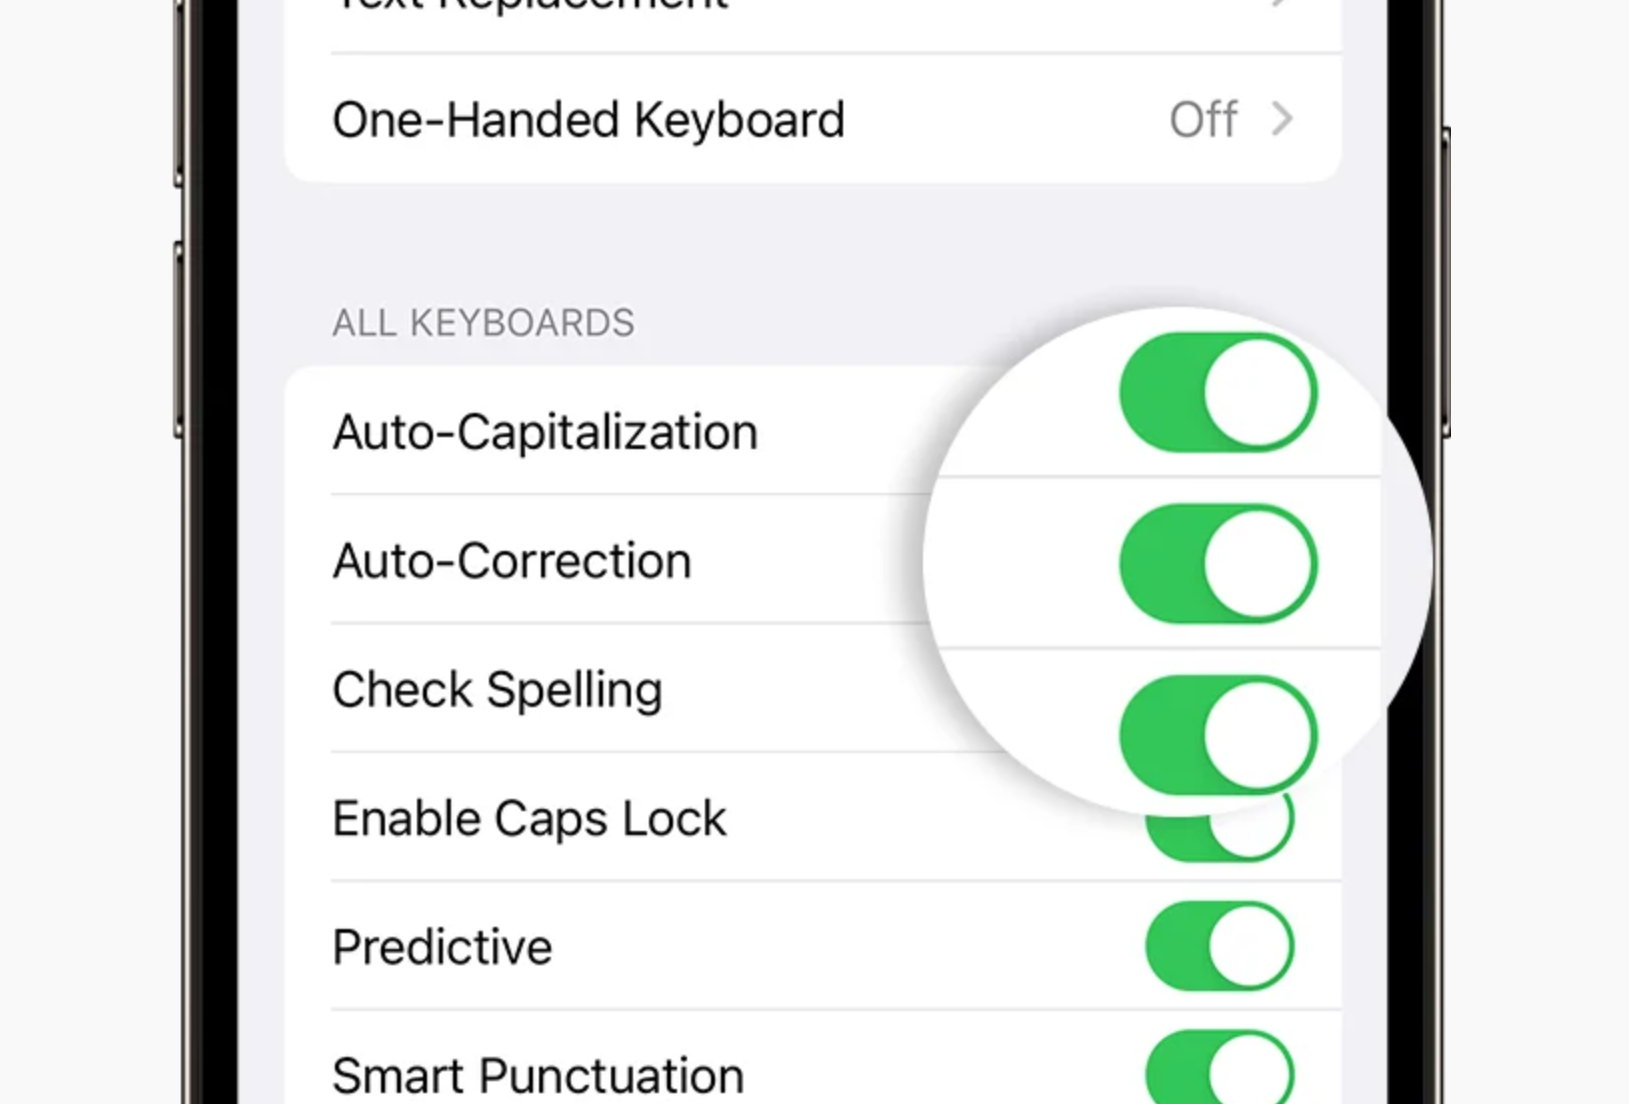
- Within the Keyboard settings, you will see a list of various options that you can toggle on or off. Find the option labeled “Auto-Correction” and tap on the switch next to it to turn it off. When the switch is in the off position, it should no longer be green or blue, indicating that auto-correction has been disabled.
Step 4: Exit Settings
- After you’ve turned off auto-correction, you can simply exit the Settings app. The change takes effect immediately, so there’s no need to restart your device.
Deactivate auto-correction on iOS – Additional Tips
- While you’re in the Keyboard settings, you might want to explore other customization options available to you. For example, you can also disable features like “Check Spelling,” “Predictive,” or “Auto-Capitalization” if you find them unnecessary.
- If you ever wish to re-enable auto-correction, simply follow the steps above and toggle the “Auto-Correction” switch back to the on position.
Disabling auto-correction can help make your typing experience on an iOS device more personalized and potentially reduce frustration by preventing unwanted corrections. Remember, you can always adjust these settings again to find the best configuration for your typing habits.
Congrats you did it – Deactivate auto-correction on iOS is done.


Leave a Reply